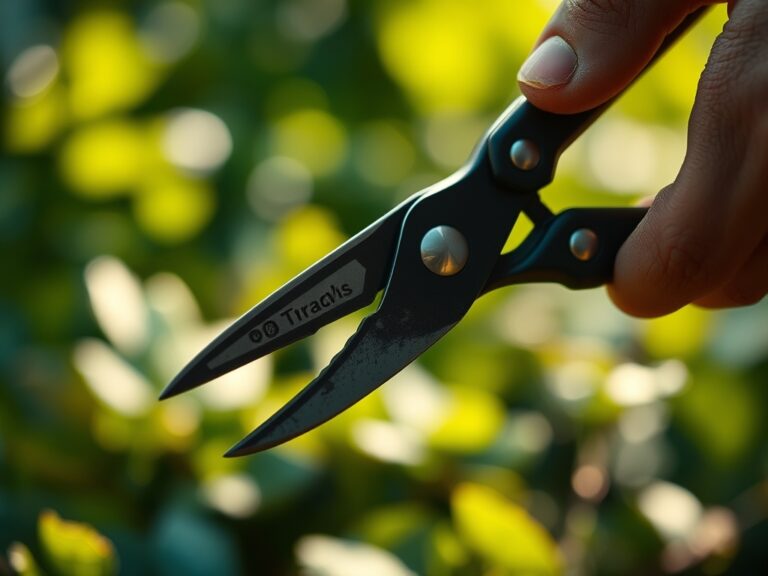
7 Ways to Use a Garden Mallet for Securely Installing Vegetable Stakes
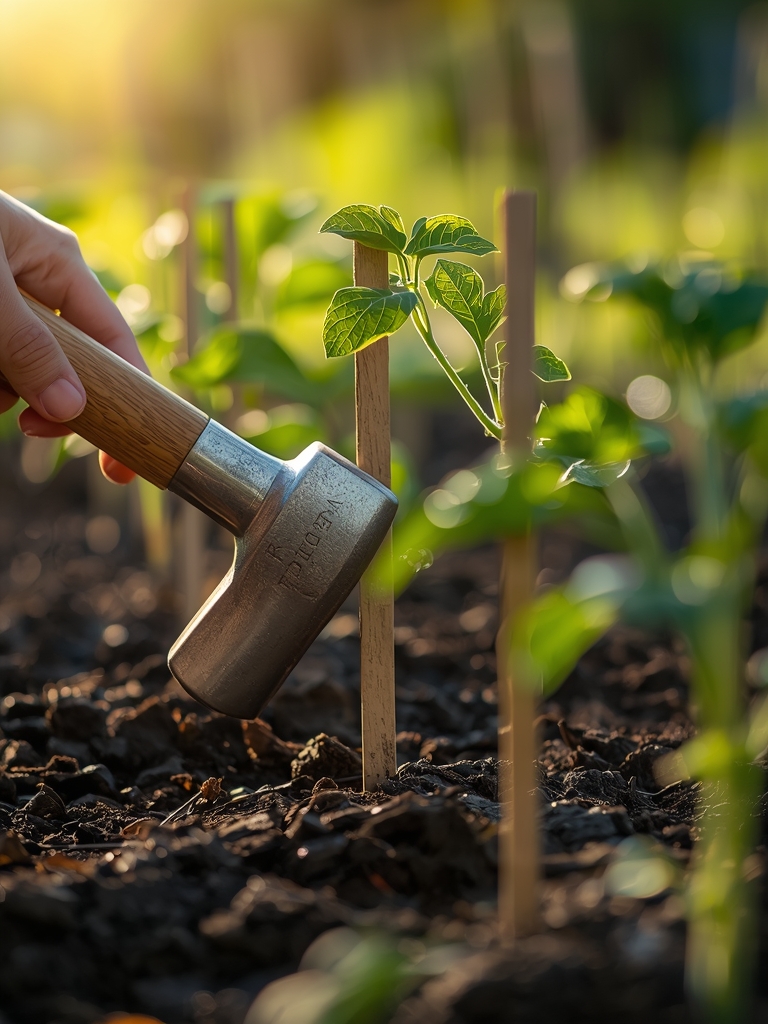
The satisfying thud of metal meeting wood echoes through the garden rows as you drive another stake deep into the earth, creating an anchor point that will support 40 pounds of ripening tomatoes by mid-July. Using a garden mallet for vegetable support stakes transforms what could be a frustrating, blister-inducing chore into a precise operation that takes seconds per stake. The rubber head absorbs shock while delivering concentrated force exactly where you need it, protecting both your joints and the integrity of bamboo, hardwood, or metal stakes. I've watched too many gardeners struggle with hammers that split their stakes or rocks that miss their mark entirely, leaving wobbly supports that fail when plants reach peak production.
Materials & Supplies

Mallets & Installation Tools:
- Rubber or deadblow mallet (24-32 oz weight recommended)
- Measuring tape for 6-8 inch spacing consistency
- Cordless drill with 1/4-inch bit for pilot holes in compacted clay
- Level to ensure 90-degree angles
Support Stakes & Hardware:
- Hardwood stakes (1×1 inch or 1×2 inch, 6-8 feet length for indeterminate varieties)
- Bamboo poles (3/4 to 1-inch diameter, naturally resistant to soil microbes)
- Metal T-posts for perimeter anchoring
- Jute twine or silicone plant ties
Soil Amendments:
- Aged compost with active mycorrhizal fungi colonies
- Bone meal (phosphorus for root establishment, 3-15-0 NPK)
- Kelp meal for trace minerals and growth hormones
Timing & Growing Schedule
Install support structures 2-3 weeks before transplanting seedlings or immediately after direct sowing for climbing varieties. In Zones 3-6, set stakes in mid-May when soil temperatures reach 55°F and frost danger passes. Zones 7-9 gardeners can install stakes in early April or again in August for fall crops.
For determinate tomatoes and peppers, install stakes at transplant time when plants reach 6-8 inches tall. Indeterminate varieties, pole beans, and vining cucumbers need stakes positioned before roots spread beyond 12 inches from the stem base. Beans germinate in 7-10 days and require support when tendrils appear at day 14. Tomatoes transplanted at 6 weeks need staking immediately to prevent root disturbance later.
Step-by-Step Instructions

Method 1: Direct Strike Installation
Position your stake 4 inches from the transplant hole. Hold the stake vertically with your non-dominant hand gripping 12 inches from the top. Strike the stake head with controlled overhead swings, driving 12-16 inches deep into soil. The mallet's weight does the work—don't muscle it.
Pro-Tip: Slightly dampen soil 30 minutes before installation in clay-heavy ground to reduce stake splitting while maintaining enough firmness for secure anchoring.
Method 2: Angled Support for Heavy Producers
Drive the first stake vertically as above. Position a second stake 18 inches away, angling it 15 degrees toward the first to create an A-frame. This configuration supports 60+ pounds of winter squash or indeterminate tomatoes loaded with fruit.
Pro-Tip: Install stakes on the north side of plants to prevent afternoon shadows from reducing photosynthesis during peak production months.
Method 3: Teepee Formation for Pole Beans
Drive three stakes in a triangle pattern, each 24 inches apart at the base. Angle stakes inward to meet at 6 feet height. Use the mallet to seat each stake 14 inches deep before binding tops with wire. This structure supports nitrogen-fixing legumes while maximizing vertical space.
Pro-Tip: Slightly rough up smooth bamboo surfaces with 60-grit sandpaper where tendril contact occurs—increased friction helps bean vines grip without slipping during wind events.
Method 4: Florida Weave Support System
Install stakes every 4 feet along your tomato row. Drive each stake 18 inches deep using firm, vertical mallet strikes. String jute twine between stakes at 10-inch intervals as plants grow, creating a woven support that distributes weight across multiple contact points.
Pro-Tip: Tap stakes an extra 2 inches deeper in sandy loam soils that experience settling after irrigation cycles—this prevents the gradual lean that destabilizes entire rows.
Method 5: Pilot Hole Technique for Rocky Soil
When you encounter subsurface rocks or heavily compacted ground, drill a 3/4-inch pilot hole to 10 inches depth. Position your stake in the hole and use the mallet to drive it the remaining 6-8 inches. This prevents stake mushrooming or splitting that occurs when forcing entry through obstacles.
Pro-Tip: Keep a bucket of builder's sand nearby—pour 2 tablespoons into pilot holes before inserting stakes to create a settling layer that locks stakes firmly while allowing seasonal soil expansion.
Method 6: Perimeter Anchoring with T-Posts
For trellis systems supporting cucurbits or climbing peas, use the mallet to drive metal T-posts at row ends. Position the mallet head squarely against the T-post cap and deliver controlled strikes until 24 inches of post sits below grade. Attach horizontal wires or netting between these anchor points.
Pro-Tip: Install T-posts with the flanges facing into the growing area—this orientation provides superior wire attachment points and prevents the post from rotating in saturated soil.
Method 7: Replacement Stake Installation Mid-Season
When stakes rot or break during the growing season, position your new stake 6 inches from the original location to avoid root zone damage. Drive it at a 10-degree angle toward the plant, then carefully transfer plant weight to the new support before removing the failed stake.
Pro-Tip: Water the plant heavily 2 hours before installing replacement stakes near established root zones—hydrated roots flex rather than snap when disturbed by vibrations.
Nutritional & Environmental Benefits
Properly staked vegetables produce 30-40% higher yields by maximizing sun exposure across all leaf surfaces. Vertical training improves air circulation, reducing fungal spore germination that causes early blight (Alternaria solani) and powdery mildew. Staked cucumbers and beans avoid soil contact, decreasing slug damage and bacterial wilt transmission from contaminated ground.
Elevated foliage allows ground-dwelling beneficial insects like ground beetles (Carabidae family) to patrol beneath plants, consuming cutworms and cabbage maggot eggs. Staked tomatoes ripen 5-7 days earlier due to improved light penetration, concentrating lycopene levels 15% higher than sprawling plants. The vertical structure creates microclimates that support multiple canopy layers—shade-tolerant lettuce thrives beneath staked beans, creating polyculture systems that enhance soil biology through diverse root exudates.
Advanced Methods & Variations
Small Space/Container Gardening:
Use 5-gallon fabric pots with a single 4-foot stake driven through drainage holes into the ground beneath. This anchors containers against wind while supporting dwarf indeterminate varieties like 'Patio Princess' tomatoes. The mallet's precision prevents pot punctures when driving stakes through synthetic materials.
Organic/Permaculture Methods:
Choose untreated cedar or black locust stakes that resist decomposition for 7-10 seasons without chemical preservatives. Install stakes in guild formations—place nitrogen-fixing scarlet runner beans on poles surrounded by heavy-feeding tomatoes and peppers that benefit from legume root nodules hosting Rhizobium bacteria. The symbiotic relationship increases available soil nitrogen by 40 pounds per 100 square feet over a growing season.
Season Extension:
Drive stakes 6 inches deeper in fall installations to prevent frost heave from disrupting spring transplants. Attach season extension fabrics directly to stakes using binder clips, creating 4-6°F temperature buffers that protect cold-hardy varieties like 'Winterbor' kale through Zone 6 winters. The secure staking withstands snow load without collapsing.
Troubleshooting: Common Mistakes
Mistake 1: Insufficient Depth
Symptom: Stakes lean progressively during the season, eventually toppling when fruit load peaks in July-August.
Solution: Minimum 12 inches depth in loam, 16 inches in sand. Test stability by applying 20 pounds of lateral pressure—stakes shouldn't budge more than 1/4 inch.
Mistake 2: Installing Too Close to Stems
Symptom: Severed roots cause sudden wilting despite adequate irrigation; plants show nutrient deficiency yellowing on older leaves.
Solution: Maintain 4-6 inch distance from main stems during installation. Root systems extend 1.5 times the visible canopy diameter—respect this space.
Mistake 3: Using Undersized Mallets
Symptom: Stakes seat unevenly, requiring excessive strikes that create stress fractures visible as vertical cracks along grain lines.
Solution: Match mallet weight to stake diameter—16 oz for bamboo up to 3/4 inch, 24-32 oz for hardwood 1-inch stakes. Let gravity and tool weight perform the work.
Mistake 4: Ignoring Soil Moisture Timing
Symptom: Stakes driven into saturated soil create enlarged holes that fill with water, promoting root rot (Pythium species) and reducing holding capacity.
Solution: Install stakes when soil reaches "crumbly" moisture—a handful compressed into a ball should break apart with light pressure, not remain cohesive or crumble to dust.
Mistake 5: Reusing Diseased Stakes
Symptom: Late blight or bacterial canker returns season after season despite crop rotation and resistant varieties.
Solution: Disinfect reused stakes in 10% bleach solution (1 part bleach to 9 parts water) for 10 minutes, then air dry completely. Stakes contacting diseased tissue harbor pathogens for 18+ months.
Storage & Ongoing Maintenance
Water staked plants with 1-1.5 inches weekly, delivered in a single deep soaking rather than multiple shallow sessions. This encourages roots to grow downward toward moisture, improving stability and drought tolerance. Check stake connections every 10 days, adjusting ties as stems thicken—growth rates of 1/4 inch diameter increase per month require loosening to prevent girdling.
Apply balanced fertilizer (5-5-5 NPK) monthly, scratching 2 tablespoons into soil 8 inches from stake base where feeder roots concentrate. For perennial asparagus or berry supports, drive stakes 20 inches deep and replace every 4-5 seasons as soil microorganisms decompose buried wood.
Store stakes horizontally off ground on cinderblock supports under roof overhangs. This prevents ground moisture wicking while allowing air circulation that inhibits mold growth. Clean soil debris from stake bottoms before storage—trapped organic matter accelerates fungal decomposition. Properly maintained stakes last 5-7 seasons for softwoods, 10+ for hardwoods.
Conclusion
Mastering mallet-driven stake installation creates the foundation for productive vertical gardens that yield consistently through challenging weather and pest pressure. The combination of proper depth, strategic placement, and appropriate stake selection transforms chaotic sprawling plants into organized, high-producing systems. Start with Method 1 for your first plantings, then progress to specialized techniques as your garden demands evolve.
Share your staking configurations and season-long results in the comments below—which vegetable varieties surprised you with their support requirements, and what modifications improved stability in your specific soil type?
Expert FAQs
How deep should stakes be driven for 8-foot indeterminate tomato plants?
Drive stakes 18-20 inches deep for indeterminate varieties exceeding 7 feet. The buried portion should equal one-quarter the above-ground stake length to counterbalance 50+ pounds of mature plant weight plus fruit load.
Can I use a hammer instead of a mallet for installing vegetable stakes?
Claw hammers concentrate force on small surface areas, splitting wood stakes and transmitting joint-damaging vibrations through your wrist. Mallets distribute impact across larger surfaces, reducing stake damage by 75% while protecting your body from repetitive stress injuries.
When is soil too wet for stake installation?
If a soil sample forms a ribbon between your fingers or water pools in a test hole within 30 minutes, postpone installation. Overly wet soil compacts around stakes, creating anaerobic conditions that suffocate roots within 6 inches of the support structure.
What's the best stake material for organic certification compliance?
Untreated hardwoods (black locust, white oak, cedar) and natural bamboo meet organic standards. Avoid pressure-treated lumber containing copper compounds (ACQ) or chromated arsenicals that leach into root zones and violate certification requirements.
How do I prevent stake wobble in sandy soil?
Drive stakes 4 inches deeper than standard recommendations and backfill holes with a 50/50 mix of native sand and clay-rich soil. The clay particles bind sand grains, increasing friction and holding capacity by 60% without impeding drainage.