9 Steps to Prepare an Indoor Fern Mounting Board: A Creative DIY Project
The damp musk of sphagnum moss, slightly acidic and earthy, fills the workspace as you peel apart fibrous clumps. Your fingers work through the strands, separating them into usable portions while bark chips scatter across newspaper. Learning how to prepare an indoor fern mounting board transforms this raw material into a vertical garden centerpiece that brings forest floor ecology into any room. This ancient mounting technique, borrowed from orchid growers and tropical plant collectors, creates a living art piece that thrives for years with proper assembly.
Materials and Supplies
Board Foundation:
- Untreated cedar, cork bark, or tree fern slab (12-18 inches long, 6-10 inches wide, 1-2 inches thick)
- Marine-grade stainless steel eye hooks (2-4 pieces)
- Galvanized wire or jute twine (20-30 feet)
Growing Medium Components:
- Long-fiber sphagnum moss (1-2 quarts, pH 3.5-4.5)
- Orchid bark chips (medium grade, 1 cup)
- Coconut coir (optional, 1/2 cup for moisture retention)
- Activated charcoal granules (1/4 cup for filtration)
Fern Selection (Hardiness Zones 9-11 indoors):
- Staghorn fern (Platycerium bifurcatum)
- Button fern (Pellaea rotundifolia)
- Rabbit's foot fern (Davallia fejeensis)
- Bird's nest fern (Asplenium nidus)
Fertilizer Requirements:
- Slow-release granular formula (3-1-2 NPK ratio for ferns)
- Liquid kelp supplement (diluted to quarter strength)
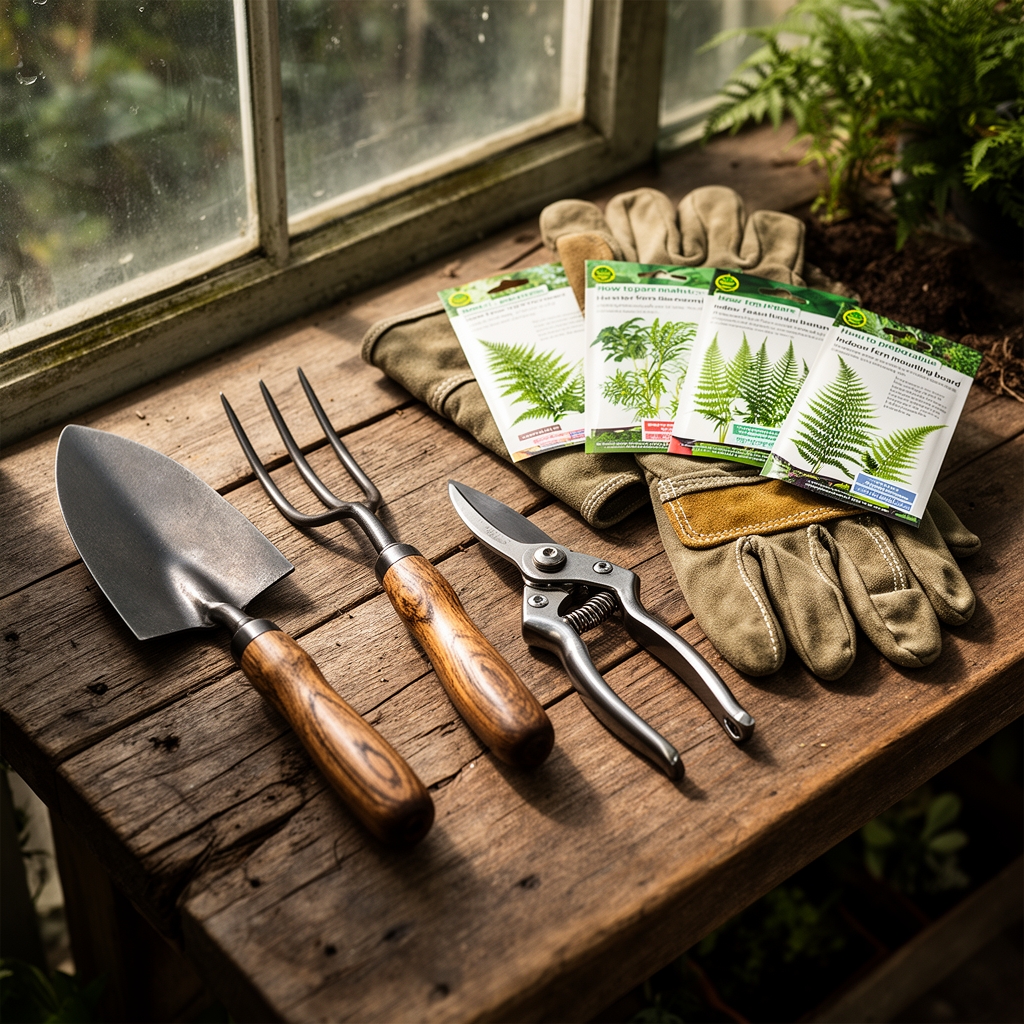
Tools:
- Drill with 1/8-inch bit
- Pruning shears (sterilized with 70% isopropyl alcohol)
- Spray bottle
- Safety goggles
Timing and Growing Schedule
Indoor fern mounting boards bypass traditional seasonal constraints. Hardiness Zones become irrelevant since controlled environments maintain 65-75°F year-round. However, timing still matters for establishment success.
Optimal Assembly Period: Spring months (March through May) align with natural fern growth cycles when fronds emerge vigorously. Plants mounted during this window establish root systems faster, achieving full attachment within 8-12 weeks.
Days to Maturity: Mounted ferns require 90-120 days to fully anchor their rhizomes and root structures. Visible new frond growth typically appears within 21-28 days post-mounting, signaling successful adaptation.
Seasonal Considerations: Avoid mounting during winter dormancy (December through February) when fern metabolism slows. Growth rates decrease by 40-60% during shorter daylight periods, even under artificial lighting.
Step-by-Step Instructions
Phase 1: Board Preparation
Drill pilot holes in the board's top corners, positioning them 1 inch from edges. Thread eye hooks through holes, twisting clockwise until the base sits flush. This creates hanging points that distribute 5-10 pounds of saturated weight evenly.
Soak the entire board in room-temperature water for 30-45 minutes. Cedar and cork bark absorb moisture differently; cedar darkens uniformly while cork develops mottled patterns. This pre-saturation prevents the board from stealing moisture from moss during establishment.
Pro-Tip: Submerge boards in dechlorinated water (let tap water sit 24 hours) to protect beneficial microorganisms that colonize mounting surfaces.
Phase 2: Moss Layer Construction
Rehydrate sphagnum moss in a bucket until fully expanded (approximately 15 minutes). Squeeze out excess water until the moss reaches 60-70% saturation. It should feel like a wrung-out sponge, not dripping wet.
Spread a 1.5-2 inch moss layer across the board's center, leaving 2-inch borders on all sides. Mix in orchid bark chips and charcoal granules, distributing them throughout the moss matrix. The bark creates air pockets essential for aerobic root respiration.
Pro-Tip: Layer moss fibers perpendicular to each other (like plywood grain) to increase structural integrity and prevent sagging over time.
Phase 3: Fern Positioning
Remove the fern from its nursery pot, gently loosening roots without breaking them. Examine the root ball for signs of rot (brown, mushy tissue). Healthy roots appear white to tan with firm texture.
Position the fern's root ball against the moss layer, centering it on the board. The plant's crown (where fronds emerge) should sit slightly above the moss surface to prevent rot. Orientation matters: staghorn ferns mount with shield fronds against the board; button ferns prefer a more upright angle.
Secure the fern by wrapping fishing line or thin wire around the root ball and board. Use a figure-eight pattern, crossing behind the board and over the moss. Apply 12-15 wraps with moderate tension. The fern should not wiggle when gently tugged.
Pro-Tip: Place a thin moss pad between wire and stems to prevent abrasion damage as the plant grows and moves.
Phase 4: Secondary Moss Coverage
Pack additional moss around exposed roots, building a 1-inch protective layer. Tuck moss beneath lower fronds and against the fern's base. This insulation maintains consistent moisture levels and mimics the leaf litter environment ferns occupy in nature.
Mist the entire assembly until water runs from the bottom. The board should feel heavy (2-3 times its dry weight) but not waterlogged.
Pro-Tip: Add a pinch of mycorrhizal fungi powder to the final moss layer. These symbiotic organisms colonize fern roots, increasing nutrient absorption efficiency by 30-40%.
Phase 5: Curing Period
Place the mounted board horizontally in a shaded location for 7-10 days. This "curing" allows initial root attachment to begin before gravity stress occurs. Mist twice daily to maintain moss moisture.
After curing, hang the board in its permanent location using sturdy picture hooks rated for 15 pounds minimum. Position boards in bright, indirect light (200-400 foot-candles), away from heating vents and direct sun.
Pro-Tip: Test hanging security by pulling downward with 20 pounds of force before adding the board. Failed hooks damage both walls and plants.
Nutritional and Environmental Benefits
Mounted ferns function as biological air filters. Their fronds absorb volatile organic compounds (VOCs) including formaldehyde and benzene, reducing indoor air pollutants by 10-15% in a 150-square-foot room. Stomata on frond undersides exchange gases continuously, releasing oxygen during daylight hours.
Mineral Composition in Fern Tissue:
- Potassium: 2.1-2.8% (supports cellular function)
- Calcium: 0.8-1.2% (strengthens cell walls)
- Magnesium: 0.3-0.5% (enables chlorophyll production)
- Iron: 100-200 ppm (critical for photosynthesis)
Indoor fern boards increase ambient humidity by 5-10% through transpiration. Each square foot of frond surface releases approximately 1 ounce of water vapor daily, creating microclimates beneficial for respiratory health.
These installations support indoor ecosystems when placed near windows. Fungus gnats and springtails colonize moss layers, establishing decomposer populations that process organic matter. While not hosting mason bees indoors, the ecological principles mirror outdoor pollinator gardens by creating habitat layers.
Advanced Methods
Small Space Optimization:
Mount multiple small ferns (button ferns, maidenhair varieties) on 6×8 inch boards. Arrange three boards vertically on a single wall section, creating a 2-square-foot green wall in a 1-square-foot footprint. This vertical stacking increases oxygen production without consuming floor space.
Organic and Permaculture Integration:
Replace commercial fertilizers with vermicompost tea. Steep 1 cup worm castings in 1 gallon water for 24 hours, then dilute to 1:4 ratio. Apply monthly during active growth. The tea introduces beneficial bacteria (Bacillus species) that outcompete pathogenic fungi.
Incorporate nitrogen-fixing bacteria by adding 1 tablespoon of garden soil to the moss layer during assembly. Native soil microbes establish symbiotic relationships with fern roots, reducing fertilizer dependence by 50%.
Season Extension Techniques:
Install full-spectrum LED grow lights (6500K color temperature) 18-24 inches above boards during winter. Provide 12-14 hours of supplemental lighting to maintain spring growth rates year-round. This extends the active growing season by 60-90 days, producing 30% more fronds annually.
Use humidity trays beneath mounted boards. Fill shallow trays with pebbles and water (keeping water level below pebble tops). Evaporation raises localized humidity to 60-70%, preventing frond tip browning during heating season.
Troubleshooting
Symptom: Brown, crispy frond edges appearing within 2-3 weeks of mounting.
Solution: Humidity levels below 40% cause desiccation stress. Increase misting frequency to 3 times daily, or relocate boards away from air conditioning vents. Install a room humidifier maintaining 55-65% relative humidity.
Symptom: Yellow fronds with black spots spreading from base to tip.
Solution: Pythium root rot from overwatering. Remove the fern from the board and trim affected roots with sterilized shears. Let the root ball air-dry for 6-8 hours before remounting with fresh, barely moist moss. Reduce misting to once every 3 days initially.
Symptom: Fern slides down board or pulls away from mounting surface.
Solution: Insufficient anchoring during initial assembly. Unwrap and reposition the plant, adding 8-10 more wire passes. Ensure wires cross behind the board at different heights to distribute tension. Cure horizontally for an additional 7 days.
Symptom: White, fuzzy growth covering moss surface.
Solution: Saprophytic mold (usually Penicillium species) from excessive moisture and poor air circulation. Increase air movement with a small fan set to low speed, positioned 6 feet away. Remove visible mold with a soft brush. Reduce misting by 30% and ensure moss dries slightly between waterings.
Symptom: New fronds emerge pale green or yellowish instead of deep emerald.
Solution: Nitrogen deficiency from depleted growing medium. Apply diluted liquid fertilizer (1/4 strength 3-1-2 NPK formula) monthly. Supplement with foliar feeding: spray frond undersides with kelp solution (1 teaspoon per quart water) biweekly.
Storage and Maintenance
Watering Protocol:
Mounted ferns require 1-2 cups of water weekly, delivered through deep misting sessions. Test moss moisture by pressing firmly; it should feel springy and slightly damp, not soggy or bone-dry. During summer (temperatures above 78°F), increase to 3 cups weekly. Winter dormancy reduces needs to 1/2 cup weekly.
Submerge entire boards in room-temperature water every 4-6 weeks. Hold underwater for 3-5 minutes until bubbles stop rising. This deep-soaking flushes accumulated salts from fertilizers and rehydrates moss cores that surface misting cannot reach.
Feeding Schedule:
Apply liquid fertilizer at quarter strength every 4 weeks during active growth (March through October). Use half-strength applications during dormancy (November through February). Alternate between balanced formulas (3-1-2 NPK) and micronutrient supplements containing iron, manganese, and zinc.
Physical Maintenance:
Remove dead or damaged fronds monthly using sterilized pruning shears. Cut at the base where fronds meet the rhizome, leaving no stubs that invite fungal infection. Expect natural frond senescence; older outer leaves yellow and die as new growth emerges from centers.
Refresh moss layers annually. Peel back the top 1/2 inch of degraded moss (recognizable by dark color and crumbly texture) and replace it with fresh sphagnum. This prevents compaction that restricts oxygen flow to roots.
Long-Term Storage:
Fern boards remain viable for 5-7 years with proper maintenance. When boards deteriorate (wood becomes punky, bark flakes excessively), remount ferns onto fresh substrates. Time remounting during spring growth phases for fastest re-establishment. Properly maintained boards develop complex epiphytic ecosystems with moss species diversity increasing over time.
Conclusion
Successful indoor fern mounting boards combine precise material selection, methodical assembly techniques, and consistent environmental management. This living wall solution delivers measurable air quality improvements while creating self-sustaining miniature ecosystems that thrive with minimal intervention. The investment of 2-3 hours during initial construction yields years of low-maintenance greenery that connects indoor spaces to forest floor ecology.
Share your mounted fern successes with local garden clubs or online plant communities. Document growth progression through monthly photos, noting frond counts and humidity adjustments. Your experiences help other growers troubleshoot challenges and inspire creative mounting variations that push this traditional technique into new applications.
Expert FAQs
Can I mount succulents or other plant types using this same board method?
Yes, but adjust the medium composition. Succulents require sharply draining substrates: use 70% orchid bark, 20% perlite, and only 10% moss. Reduce watering frequency to once every 10-14 days. Bromeliads and Tillandsia species adapt perfectly to this mounting style without medium modifications.
How do I prevent pests from colonizing the moss layers?
Sterilize moss before use by microwaving damp material for 90 seconds (kills eggs and larvae). Introduce beneficial predators like Hypoaspis miles (predatory mites) that consume fungus gnat larvae and thrips. These mites establish permanent populations in organic growing media, providing ongoing pest control.
What light intensity do mounted ferns need to produce maximum fronds?
Ferns thrive in 200-400 foot-candles (equivalent to bright, indirect window light). Measure intensity with a light meter app; most smartphones provide adequate accuracy. Staghorn ferns tolerate slightly higher levels (300-500 foot-candles), while maidenhair varieties prefer the lower range. Insufficient light (below 150 foot-candles) reduces frond production by 60-70%.
How quickly do fern roots attach to mounting boards?
Expect initial root adhesion within 21-28 days under optimal conditions (65-75°F, 60% humidity, consistent moisture). Full attachment requiring no wire support takes 90-120 days. Staghorn ferns produce specialized shield fronds that grow directly against boards, creating permanent bonds within 8-10 weeks.
Can outdoor ferns transition to indoor mounted boards successfully?
Yes, with proper acclimatization. Move outdoor ferns through a 14-day transition period in a shaded porch or garage, gradually reducing light intensity. This prevents shock from sudden environmental changes. Clean foliage thoroughly to remove outdoor pests before bringing plants inside. Success rates exceed 80% when transition occurs during spring or early summer active growth phases.